
Using Avatar Academy: Getting started with your VR training system
How to set up Meta Quest headsets for training, then add trainees and follow their results in the web portal.

Part 1
Operating Headsets
Avatar Academy is compatible with the Meta Quest line. These steps get a new headset ready for training.
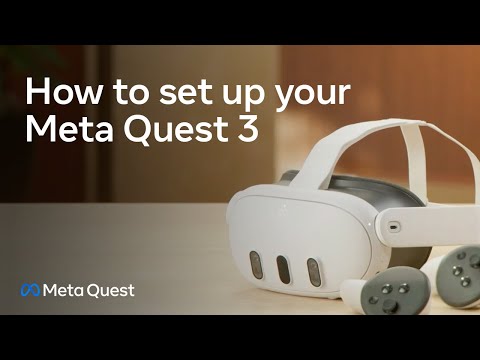
Hardware setup and initial configuration
- Unbox the headset and controllers, removing all protective films and packaging.
- Charge the headset using the USB-C cable provided.
- Download the Meta Horizon app (formerly the Meta Quest app) on your smartphone and create a Meta account if you do not have one.
- Turn on the headset and pair it with your account through the app.
- Follow the in-headset tutorial to set up Wi-Fi, language preferences and the fit of the headset.
If your headsets are managed with Meta for Work, follow Meta’s setup guide for business instead.
Putting on the headset
- Loosen the side straps, then the top strap.
- Starting from the back, put on the headset. Pull the back strap down until it cradles the base of your head. If you wear glasses, put the headset on from the front first.
- Tighten the side straps, then the top strap. The headset should fit comfortably without pressing hard on your face or head.
- Holding both sides of the headset, slowly move it up and down until the picture is clear and the headset feels comfortable.
- If you wear glasses, fit the glasses spacer into the headset before using it.

Using hand tracking
Avatar Academy uses hand tracking only, so anyone can pick up a headset and start training without learning how to use gaming controllers.
Interactions use simple gestures, such as pressing a button with a finger or grabbing an object by closing your fist.
Make sure hand tracking is turned on in the headset settings before starting a training session.
Boundary setup
The boundary (called Guardian on older headsets) appears in VR when you get close to the edge of your play area. Choose Stationary or Roomscale.
- Stationary: for training while sitting or standing in one place. It creates a default area of 1 by 1 metre (3 by 3 feet) centred on you.
- Roomscale: for training while moving around. You draw the boundary on the floor of your space. We recommend a clear area of at least 2 by 2 metres (6.5 by 6.5 feet).

Reset position
You can recentre your view at any time.
- Hold up your right hand with the palm facing you.
- When the icon appears, pinch your index finger to your thumb and hold until the view resets.
Connecting to Wi-Fi
The headset needs a Wi-Fi connection to use most features and content. To change network:
- Turn on the headset and put it on.
- Open Settings from the menu.
- Select Wi-Fi.
- Select the network you want to join.
- Enter the network password if prompted.
- Select Connect.
User comfort and safety
- Adjust the lens spacing (IPD) for a clear image. On Meta Quest 3, use the wheel at the bottom left of the headset.
- Make sure the headset fits securely so it does not wobble.
- Brief trainees on avoiding motion sickness, and encourage breaks during long sessions.
- Keep the headset away from windows and do not use it outside: sunlight can permanently damage the lenses.
- Clean the headset with non-alcoholic, antibacterial wipes. Alcohol wipes can damage it.

Part 2
Using Avatar Academy
Trainees train in the headset; administrators manage trainees and see results in the Avatar Academy web portal.
Overview
- Put on the Meta Quest headset.
- Download Avatar Academy from the Meta Quest Store.
- Open Avatar Academy from your library.
- Log in with the username and PIN chosen when you registered.
- Choose a training course, then a module.
- Each module has four learning modes: Demonstration, Explainer, Practice and Exam. Trainees complete every mode to pass.

Training together with Meetup
Meetup brings up to four people from your organisation into the same session. It is available to any customer on request.
- Training together: trainers and trainees can work through any course together, in every learning mode. Some scenarios are built for teams and need at least two people to complete.
- Meeting room: talk it through in VR with a whiteboard and slides.
- Who is who: everyone has their own coloured avatar and a name tag that animates when they speak.
- Records: training a person completes in Meetup counts towards their own results in the web portal.
Sessions are private to your organisation. To turn on Meetup for your organisation, contact Mersus.

Training management system: adding trainees
- Administrators add trainees in the Avatar Academy web portal.
- The designated administrator receives an email invitation to the portal. Ideally, use a dedicated VR training email account.
- The administrator creates a password and logs in to a dashboard of the relevant training data.
- Go to the Trainees section and select Add Trainees.
- Enter the trainee’s email, first name, surname and training course, then select Send Invitation.

Registration
- The trainee receives an email from Avatar Academy and follows the link to a registration page.
- They choose a username, password and PIN for their training.
- Once submitted, a welcome email confirms the account.
- In the headset, they open Avatar Academy and log in with their username and PIN. In the web portal they can see their training data and change their password, PIN and username.
No email? Trainees can still register in the web portal: on the overview page, select Need to link account and enter the email address already given to Avatar Academy.

Training data
In the web portal, administrators see the training measures that matter to them:
- Dashboard: training use over time, including sessions, duration, locations and module completion.
- Courses: results by module, with leaderboards of the most active trainees.
- Trainees: each trainee’s sessions, duration and overall performance, with their individual progress.

Training completion
When a trainee completes a module, the administrator receives an email summarising their sessions, errors, duration and performance over time, so trainers stay up to date with every trainee.

Editing trainees
From the Trainees page:
- Edit trainee: correct a name, or add the trainee to other courses.
- Archive trainee: mark an active trainee as inactive. This removes them from leaderboards.
- Delete trainee: remove an inactive trainee from the platform, together with all personal data related to them.

Need help with Avatar Academy?
Tell us what you need and we will get back to you. Not using Avatar Academy yet? Ask for a demo.